DIY Concrete Patio: A Comprehensive Guide
Exploring the Ins and Outs of Pouring Your Concrete Patio
7 Steps to a Successful DYI Concrete Patio

Are you interested in a DIY concrete patio project? Doing it yourself can be very fulfilling, blending creativity with practicality. To achieve a successful outcome, it's essential to understand all the steps of the process. This guide will delve into the steps involved in your DYI Concrete Patio. We will also discuss the reason behind each step of the process. This will help empower you with the knowledge to make informed decisions. You can then create a durable, beautiful patio space.
Preparing for your DYI Concrete Patio
1. Tools and Equipment
Before starting, gather essential tools for the project. Here is a list of equipment you will need:
- A concrete mixer or wheelbarrow for consistent mixing
- A shovel and rake for spreading the concrete
- A screed board or straight edge for leveling
- A float and trowel for finishing touches
- Protective gear such as gloves and goggles ensure safety during handling and pouring.
2. Base Material:
Clearing the area of debris and vegetation is crucial to creating a stable foundation. Compacting the soil beneath the concrete slab helps prevent settling. This also ensures long-term durability in the finished product. Adding a layer of gravel or crushed stone aids in drainage. It also provides a solid base for the concrete to rest upon, reducing the risk of cracks and unevenness over time.
3. Thickness Requirements:
The minimum thickness recommended for residential concrete patios is 4 inches. Thicker slabs can withstand heavier loads and resist cracking better, especially in regions with varying weather conditions. Understanding the thickness requirements ensures your patio can support furniture, foot traffic, and other activities without compromising stability.
4. Best Types of Concrete:
Opting for a high-quality concrete mix designed for outdoor use is essential. These mixes typically contain additives like fibers or plasticizers, enhancing strength and durability. Choosing the right blend ensures that your patio withstands weather elements, foot traffic, and other environmental factors. Always follow the manufacturer's mixing ratios and additives instructions. This will help guarantee a well-blended, resilient concrete slab.
Your DYI Concrete Pouring Process
Now that you have the necessary tools for the project and have prepared the area, it is time to pour the concrete.
5. Mixing the Concrete
Achieving the right concrete mix consistency is key to a successful patio project. Follow these steps for optimal mixing:
Measure Accurately:
Use a measuring bucket or container to accurately measure the water and concrete mix according to the manufacturer's recommended ratios. Consistency in measurement ensures a uniform mix.
Mixing Process:
Start by adding the required amount of water to the mixer or wheelbarrow. Gradually add the concrete mix while continuously mixing to prevent lumps and ensure thorough blending.
Check Consistency:
Aim for a smooth, workable consistency that is not too wet or dry. The concrete should hold its shape when formed into a ball but still be pliable enough for spreading and leveling.
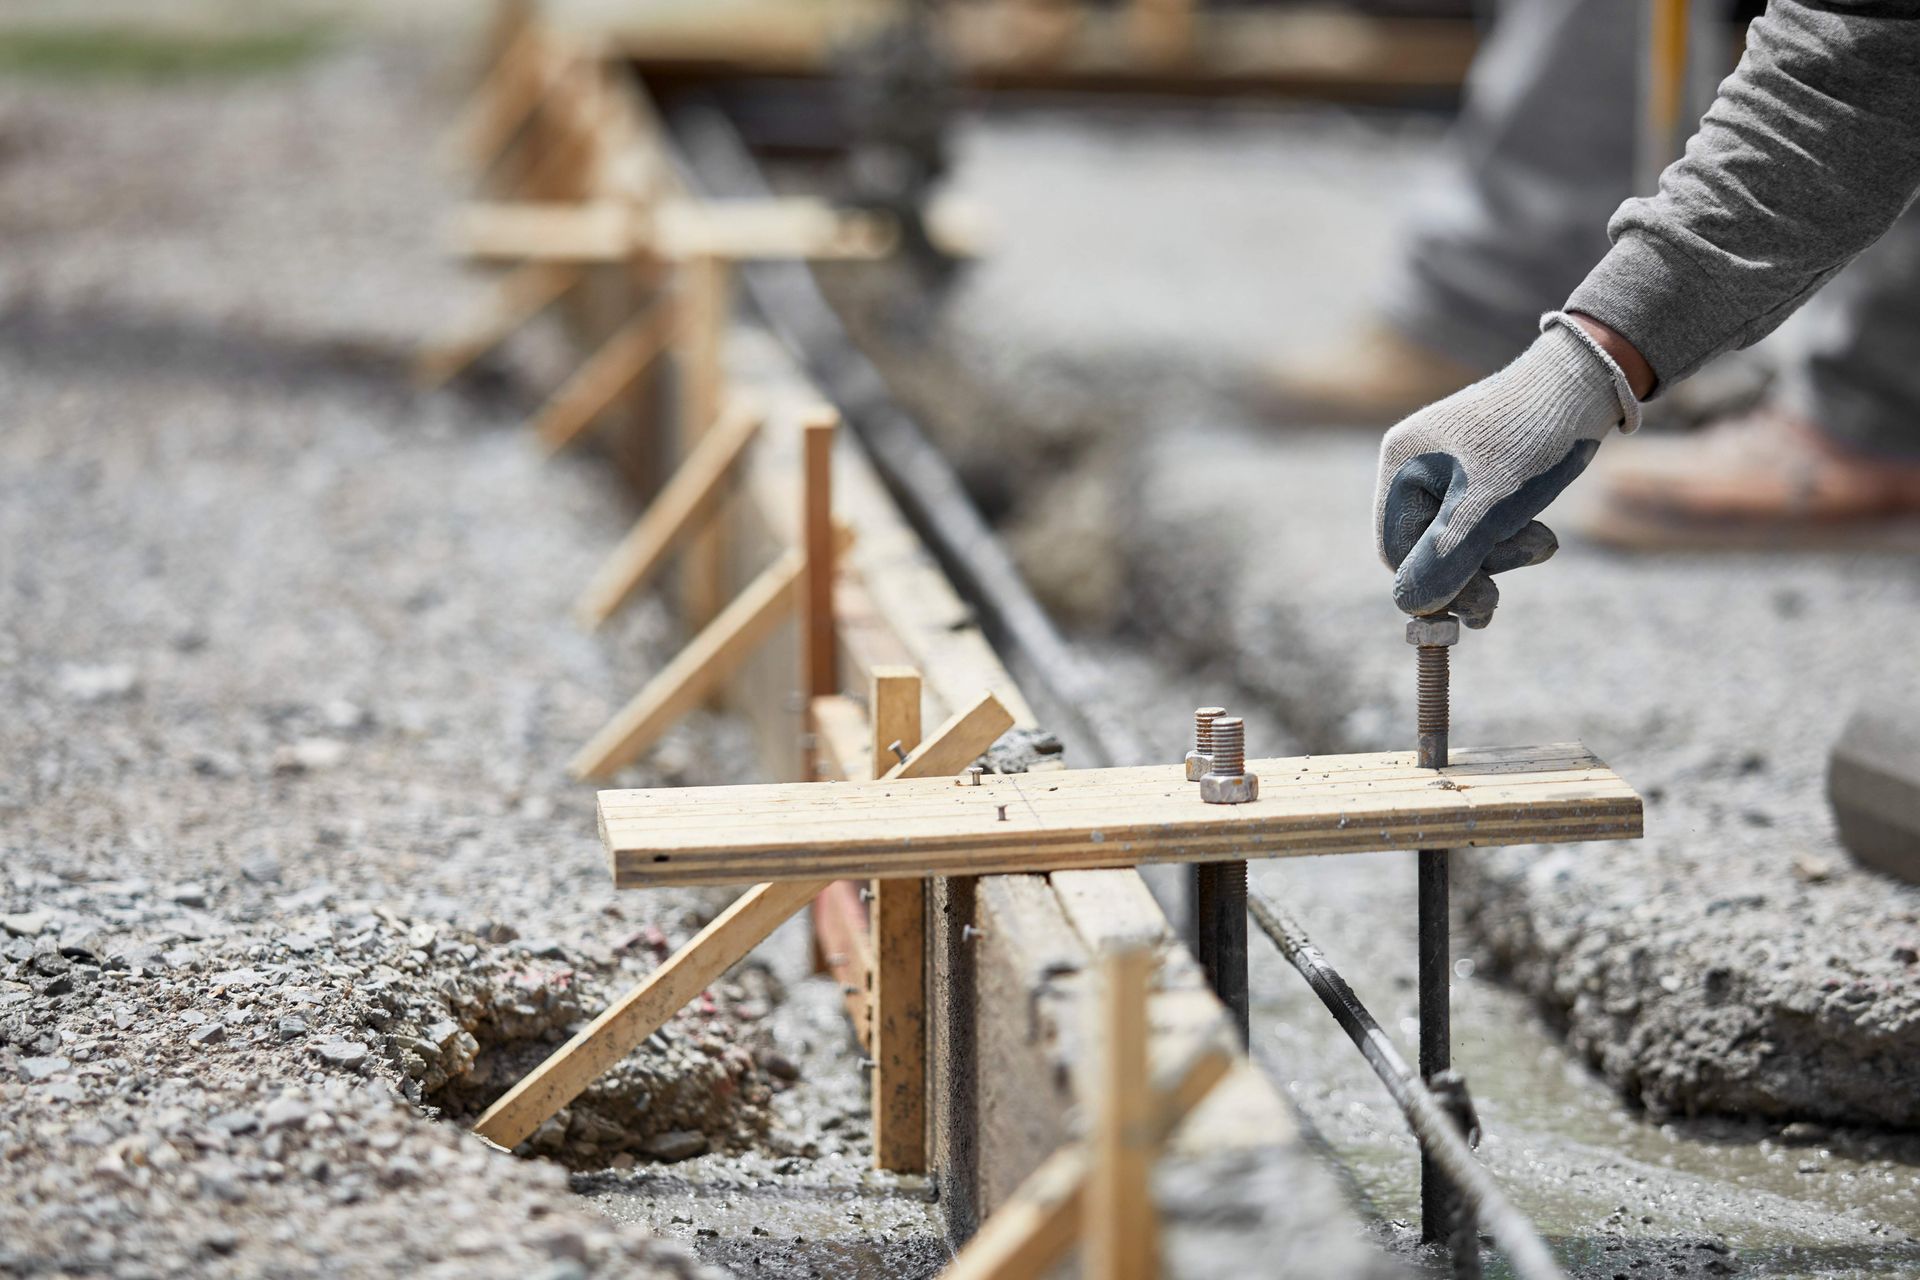
6. Pouring and Leveling:
Once the concrete mix is ready, follow these steps for pouring and leveling the patio:
Pouring the Concrete:
Start pouring the mixed concrete onto the prepared area in manageable sections. Use a shovel or rake to spread the concrete evenly, ensuring consistent thickness throughout the patio.
Screeding for Leveling:
Use a screed board or straight edge to level the concrete surface. Begin at one end of the patio and pull the screed board across the surface in a back-and-forth motion, removing excess concrete and creating a smooth, level finish.
Creating Slope for Drainage:
Ensure the patio slopes slightly away from structures or towards designated drainage areas to prevent water pooling. Use a level or measuring tool to achieve the desired slope for efficient water runoff.
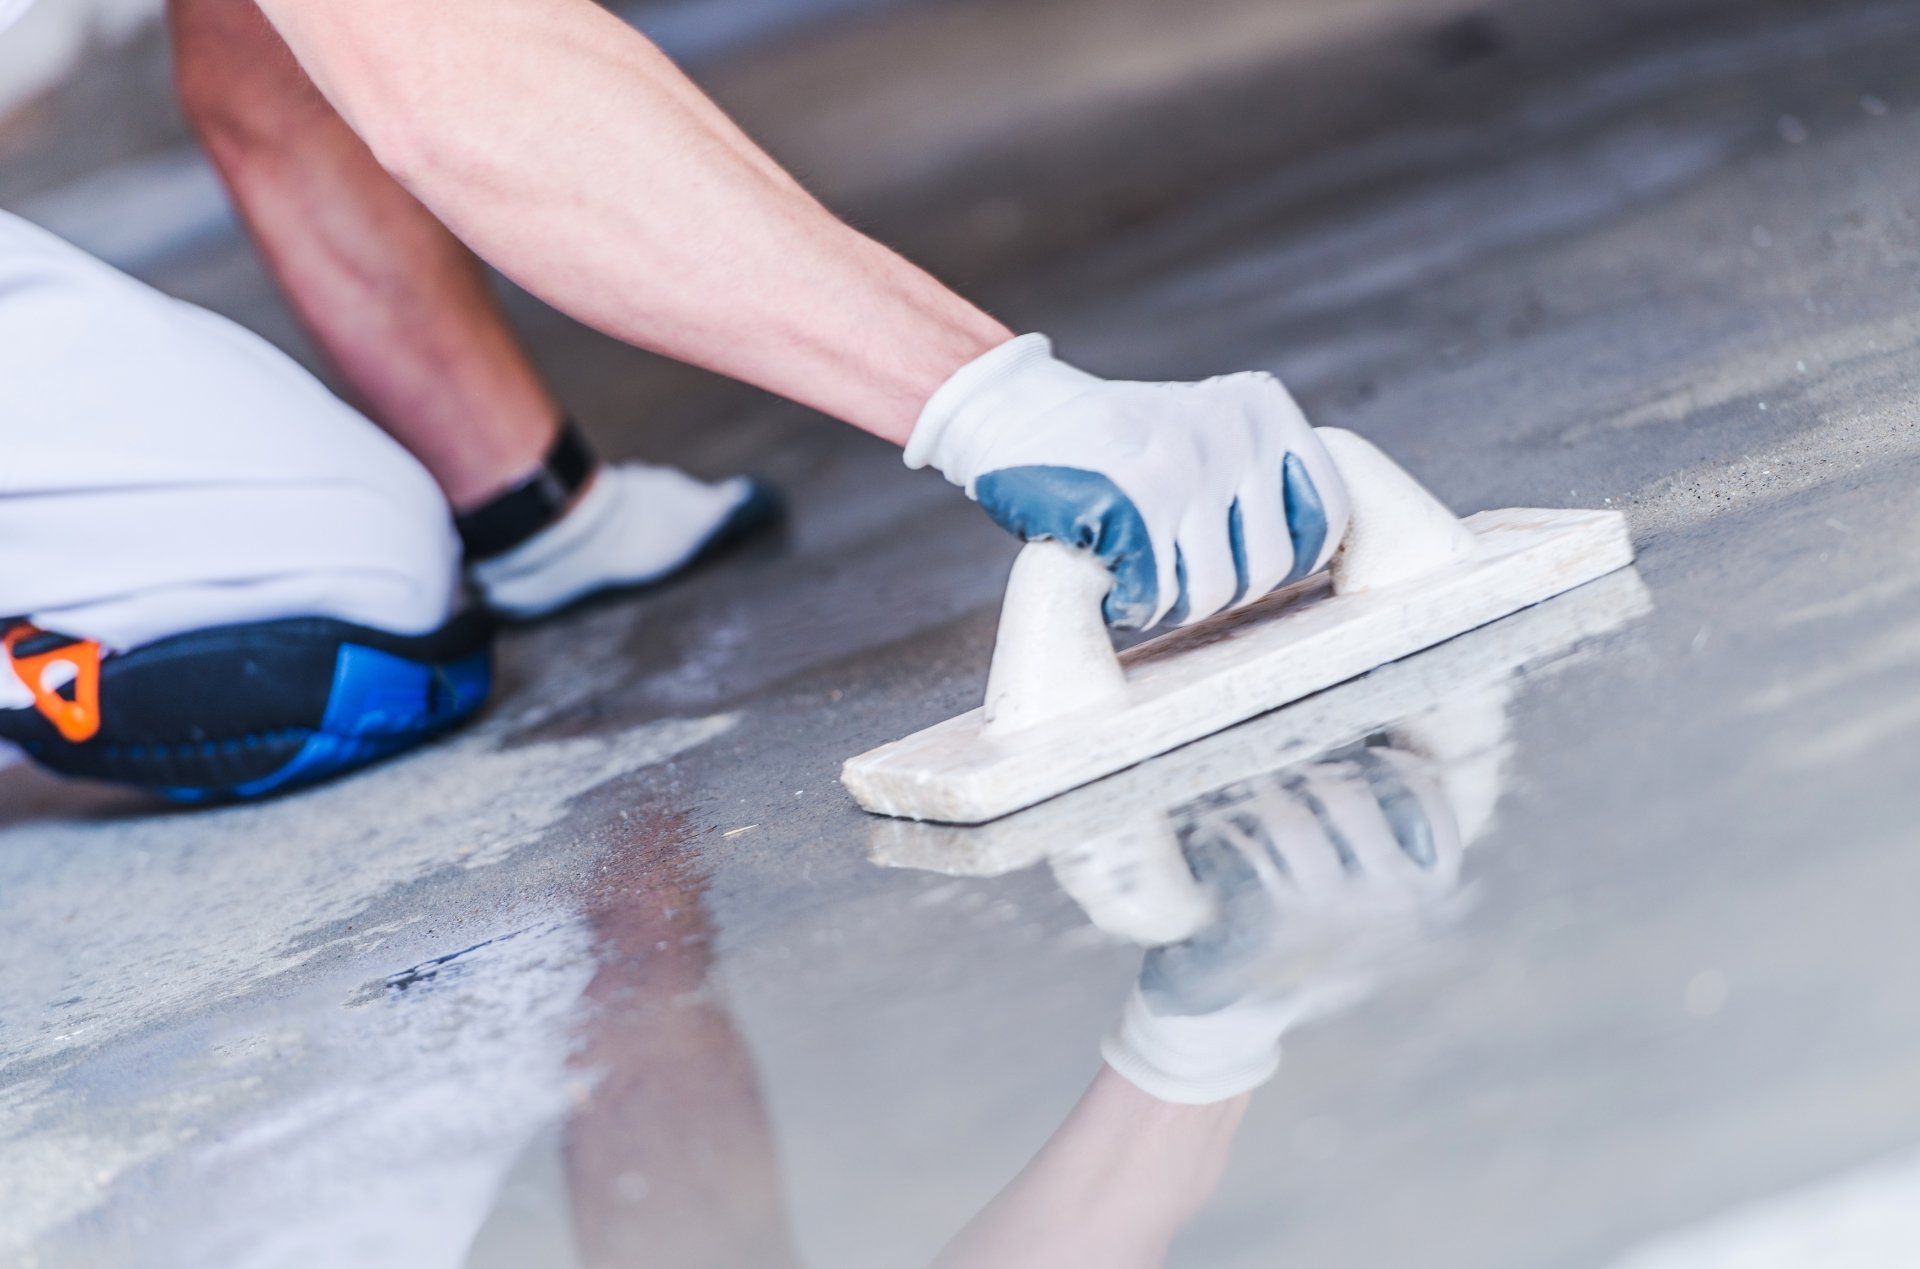
7. Finishing Touches:
After leveling the concrete, it's time for finishing touches to enhance the patio's appearance and durability. Here are some finishing options and techniques.
Float Finish:
Use a float to smooth the surface and fill in small voids or imperfections. This creates a uniform texture and prepares the surface for additional finishing options.
Broom Finish:
Consider a broom finish for added traction and a decorative touch. After the concrete has been partially set, run a broom over the surface in even strokes to create textured lines. This finish is ideal for outdoor areas to prevent slipping.
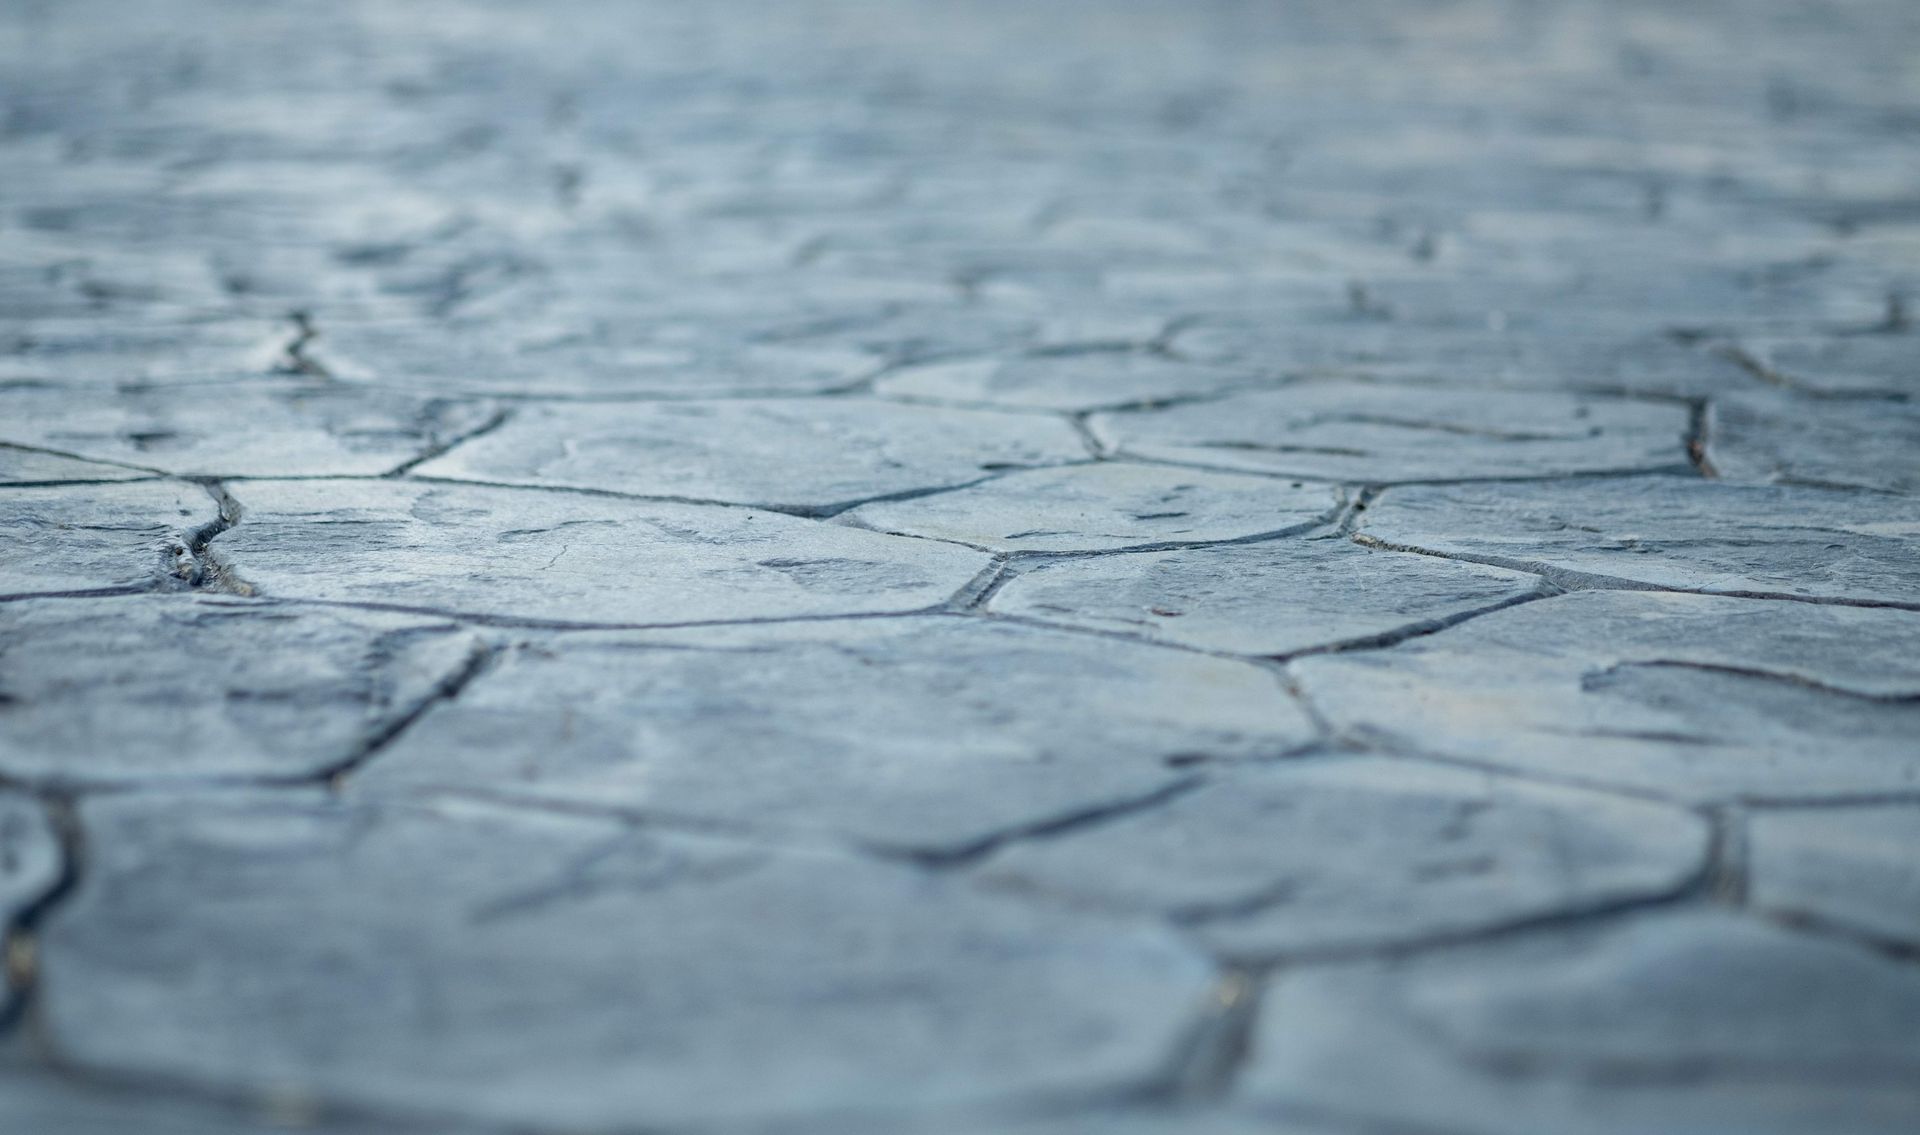
Stamped Concrete:
For a more decorative look, stamped concrete offers a variety of patterns and designs. Stamping mats are pressed into the surface while the concrete is still wet, creating the appearance of brick, stone, or tile.
Sealing the Surface:
Apply a concrete sealer once the patio has fully cured to protect the concrete from stains, moisture, and UV damage. Sealers come in various finishes, including matte, glossy, and satin, enhancing the patio's aesthetics and longevity.
DIY vs. Professional
While DIY projects offer a sense of accomplishment and potential cost savings, several factors warrant consideration
Cost Comparison
DIY projects may seem cost-effective initially, but factoring in the cost of tools, equipment, materials, and potential mistakes can add up. Hiring professionals often results in a more efficient and cost-effective solution, as they can access specialized tools, expertise, and quality materials.
Quality and Expertise
Professionals bring years of experience and knowledge, ensuring proper mixing, pouring, and finishing techniques. They can recommend the best concrete mix and additives for your specific needs, resulting in a durable, long-lasting patio that meets your expectations.
Time and Convenience
DIY projects require time for preparation, execution, and potential troubleshooting. Professionals can complete the job efficiently, saving you time and hassle. Additionally, they handle all aspects of the Project, from planning to cleanup, providing a seamless experience.
Should you DYI a Concrete Patio?
Understanding the rationale behind each DIY concrete patio process step gives you insight into the complexities and considerations involved. While DIY projects offer a sense of autonomy, the expertise, quality assurance, and convenience provided by professional concrete services often outweigh the initial expense. Contact us today for a cost estimate, and let us help you create a durable, beautiful concrete patio that enhances your outdoor living space for years to come. I hope this message finds you well.
You might also like
Blog Posts